Biochar Cooker
Posted on 2025-01-29 14:30 in tools • Written by Arno Peters
We created this biochar cooker during the second week of my first PDC. It is made from two large drums and one smaller can.
Materials required
- two drums with a lid of equal size (fuel drum and cooking support)
- one larger drum (optional, air inlet skirt)
- one can (chimney)
- two metal rods (for drum manipulation and for the cook-pot to sit on)
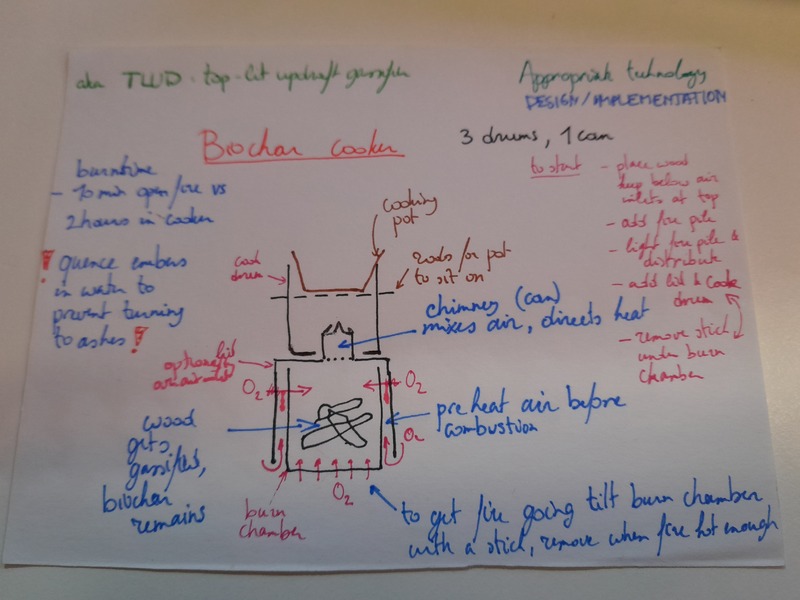
Schematic diagram (from toolbox). The fire resistant grips for the lid are missing in this diagram.
The schematic mentions three drums. The third drum is optional. It can be used to preheat the air flowing into the top of the fuel drum. Therefore the diameter of this drum needs to be larger than the other two drums. In our case we used the lid that came with the drum to only seal the top part.
Constructing the cooker
The construction of this cooker was as follows:
- make holes in the bottom of the fuel drum
- the purpose of these holes is to provide the initial fire with more oxygen to ensure a good start of the fire;
- make holes along the edge of the fuel drum about 5-10cm below the
top
- these are the air inlets during the main burn;
- by sticking the metal rods through them, the drum can be transported or emptied without getting burned;
- make incisions in the lid of the fuel drum; bend the incisions up to
provide a way for the chimney to stay in place on top of the lid;
- provide a way for the lid to be removed by bending part of the lid outwards; this extrusion can be used to hold a wooden stick in place as a fire resistant handle (see photo of initial burn below);
- the lid with the chimney is placed only after the initial fire reaches the main fuel;
- make incisions in the bottom of the chimney can; bend these
partially up;
- the chimney concentrates the heat and the gasses;
- the ragged edges of the bottom of the can provide a mixing action of wood gasses and oxygen;
- cut out a hole in the bottom of the drum for cooking support. The
hole needs to be big enough to easily fit over the chimney; and cut
out a few holes in the middle of the cooking support for the metal
rods to slide though;
- the metal rods form the support for a cook-pot;
- the metal rods can also be used to transport this drum without getting burned;
- the cooking support is placed after the lid with the chimney;
Preparing for a burn
- Have a bucket of water on hand; - this is for safety reasons; - and to quench the biochar before it burns to ashes;
- Place the fuel drum on an even surface;
- Place the fuel drum away from fire prone areas, be sure to watch where heat and embers might unintentionally start a new fire;
- Fill the fuel drum with wood; start with small twigs at the bottom, growing larger towards the middle of the drum and use medium size wood to fill the fuel drum to a few centimeters under the air inlets on the side;
The burn
- Put a stick under the fuel drum; this lets air in from the underside of the fuel drum; this is necessary to get the fire started;
- Put a fire pile on top of the fuel to start the fire;
- Light the fire pile;
- When the fire pile is burning well, distribute the pile across the top of the fuel drum;
- Remove the stick under the bottom of the fuel drum;
- If the fire keeps burning, place the lid with the chimney on top and the fire should now start to burn even brighter;
- Place the cooking support drum with the metal rods;
- Place the cook-pot and start cooking;
After the burn
After some time the wood will have completely gassified and the heat will reach the bottom. The fire will start to smoke. When this happens, it is time to rescue the biochar from turning into ashes.
Use the metal rods to take off the cooking support. Remove the lid with the wooden sticks attached to the lid, or use the metal rods again. Push the metal rods through the air holes at the top of the fuel drum and empty the drum in the bucket of water.

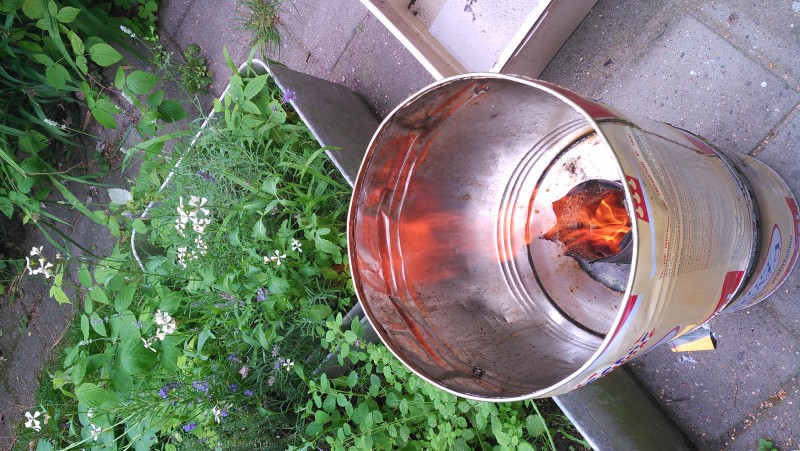
First burn after construction. Note the wooden handles that can safely lift the lid from the fuel drum.
Looking into the biochar cooker. Note the jagged edges on the chimney. In this case we lifted the lid with the metal rods.
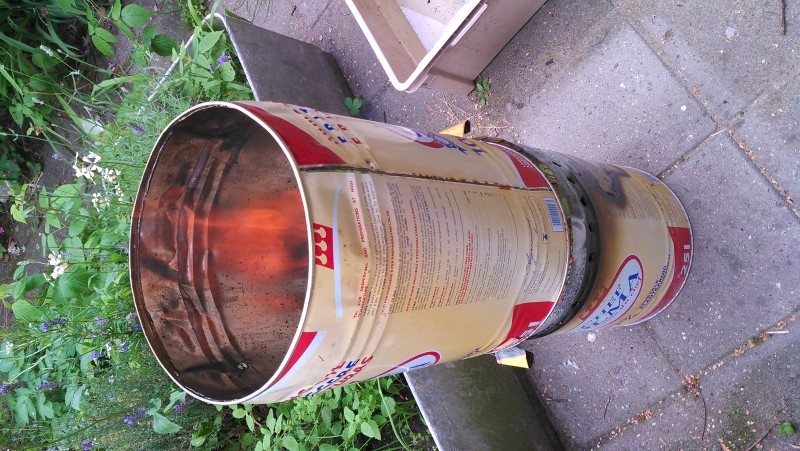
My PDC’s version of a biochar cooker. Note the air inlet holes in the bottom drum. The drum is charred at the inlets because the fire can only burn where there is oxygen in addition to wood gas and heat: at the top of the fuel drum near the air inlets.